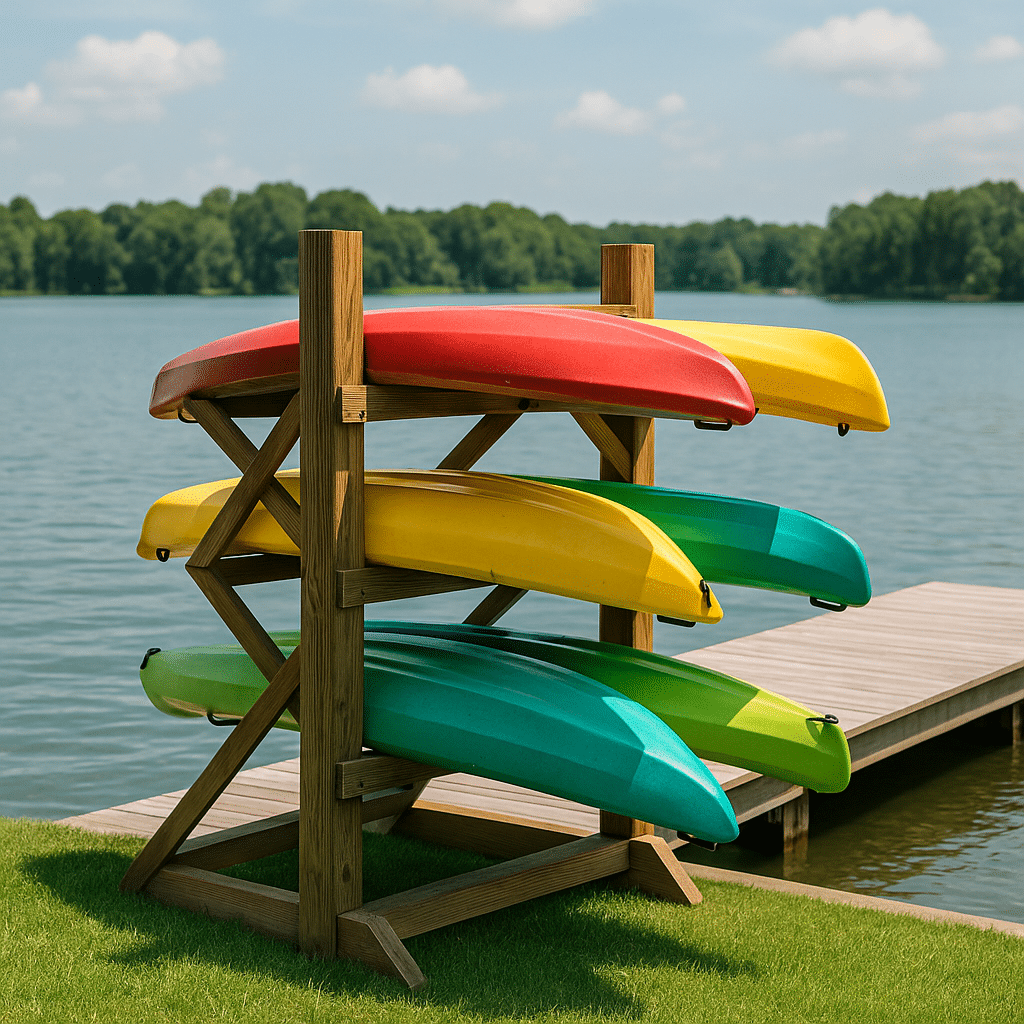
If you love spending time kayaking on Texas lakes, you know how important it is to keep your gear safe, dry, and organized. Instead of dragging your kayak to and from the garage every time, why not build a simple kayak rack right by your dock? It is an easy project that saves time, protects your kayak, and keeps your waterfront looking neat. Let us walk through it step-by-step.
Step 1: Pick the Perfect Location
Start by choosing a spot close to your dock but above the waterline. You want the kayak rack to be easily accessible without risking flooding. A flat, shaded area is best to protect your kayak from sun damage and make loading and unloading simple.
Tip: Keep it close enough that you can lift the kayak with minimal effort but far enough from heavy foot traffic.
Step 2: Gather Your Materials
You do not need fancy tools or expensive supplies. Here is a basic list:
- 4 pressure-treated 4×4 posts
- 2 pressure-treated 2×6 boards
- Galvanized screws or bolts (for weather resistance)
- Drill and drill bits
- Saw (hand saw or circular saw)
- Measuring tape
- Level
- Concrete mix (optional for extra stability)
Optional: Foam pipe insulation or padding to cover the rack arms and protect your kayak from scratches.
Step 3: Measure and Cut Your Wood
Measure and mark your cuts carefully:
- Cut the 4×4 posts to your desired height. Around 5 feet is common.
- Cut the 2×6 boards into 4 equal arms, about 3 feet long each.
Make sure all your cuts are clean and straight for a strong, stable rack.
Step 4: Assemble the Rack
Now it is time to put it all together:
- Lay two of the 4×4 posts parallel to each other on the ground.
- Attach two 2×6 arms at an angle (about 45 degrees) across the posts — these will hold the kayaks.
- Repeat for the other two posts.
- Stand the sets up and space them about 4-5 feet apart, depending on your kayak size.
- Connect the sets with two horizontal 2×6 boards at the top and bottom for extra support.
Use the level to ensure everything is even, and double-check all your bolts or screws are tightened securely.
Optional: Set the posts into the ground with concrete for permanent installation, especially if you expect heavy winds or water surges.
Step 5: Add Padding
To keep your kayak in good condition, wrap the arms with foam pipe insulation or pool noodles. Secure them with weather-resistant tape or zip ties.
This small step can greatly extend the life of your kayak by preventing dents, scrapes, and UV damage.
Step 6: Load Up and Enjoy!
Gently place your kayak onto the rack, cockpit side down. You can even build a multi-tiered version if you have more than one kayak or want to add paddleboards or canoes.
Store your paddles by attaching hooks or small brackets to the side of the rack for a complete, organized setup.
Bonus Tips for Kayak Storage
- Always rinse your kayak with fresh water after each use, especially if you have been in salty or muddy areas.
- Cover your kayak with a UV-protective tarp if it will be stored outside for long periods.
- Inspect the rack once a season for any loose screws or weather damage.
Build the Ultimate Waterfront Setup with EZ Dock Texas
A kayak rack is just one piece of creating the perfect waterfront lifestyle. EZ Dock Texas offers floating docks, launch systems, and accessories that make every lake day better. Ready to enhance your dock setup? Visit our contact page or connect with us on Facebook to start building your waterfront dream today!


